Moving to a new place usually involves a number of logistically tricky steps. And one of these tricky steps has to do with non-solid objects — of which there are usually plenty in any given home. In other words, ‘to pack liquids or not to pack liquids’ — that is the question you may find yourself asking somewhere along the way.
As a rule of thumb, it’s best not to. Because when it comes to moving liquids, the results are not always pretty. From your old home to the packing box to the moving truck to the road to your new home, there are countless things that can go wrong. And the slightest misstep — a loosely closed cap, a heavily stacked or misturned box, a small bump in the road — can mean disaster. Of course, a DIY move down the street is obviously not as complicated as a long-distance move cross country. In fact, packing liquids with long-distance movers is strongly advised against. But packed liquids can be unpredictable no matter the distance — so it’s better to be safe than sorry.
That said, depending on the nature of the move and the amount of stuff you have, packing some liquids may be unavoidable. For example, certain liquids may have practical or sentimental value — or even be integral to your line of work — but still be tricky to transport separately. Maybe you need to put some in storage indefinitely, or simply have too many liquids that you can neither discard nor move by yourself. Whatever the case may be, if you’ve decided to take a chance and bundle a few fluids along with the rest of your stuff, there are ways to do it. And to ensure that everything is in its right place when you unpack at your new home, we’ve compiled some practical step-by-step moving tips to help pack your liquids below.
Step 1: Organize Your Liquid Items
A few days before your actual move, do a thorough inventory. Your liquids are likely scattered throughout your home — your kitchen, bathroom, closets, garage, etc. So first off, you’ll want to consolidate them in one place. That way they’re all clearly visible and, therefore, less likely to be damaged, spilled, or go missing. And they’re also out of the way of your other, non-liquid stuff during the packing process.
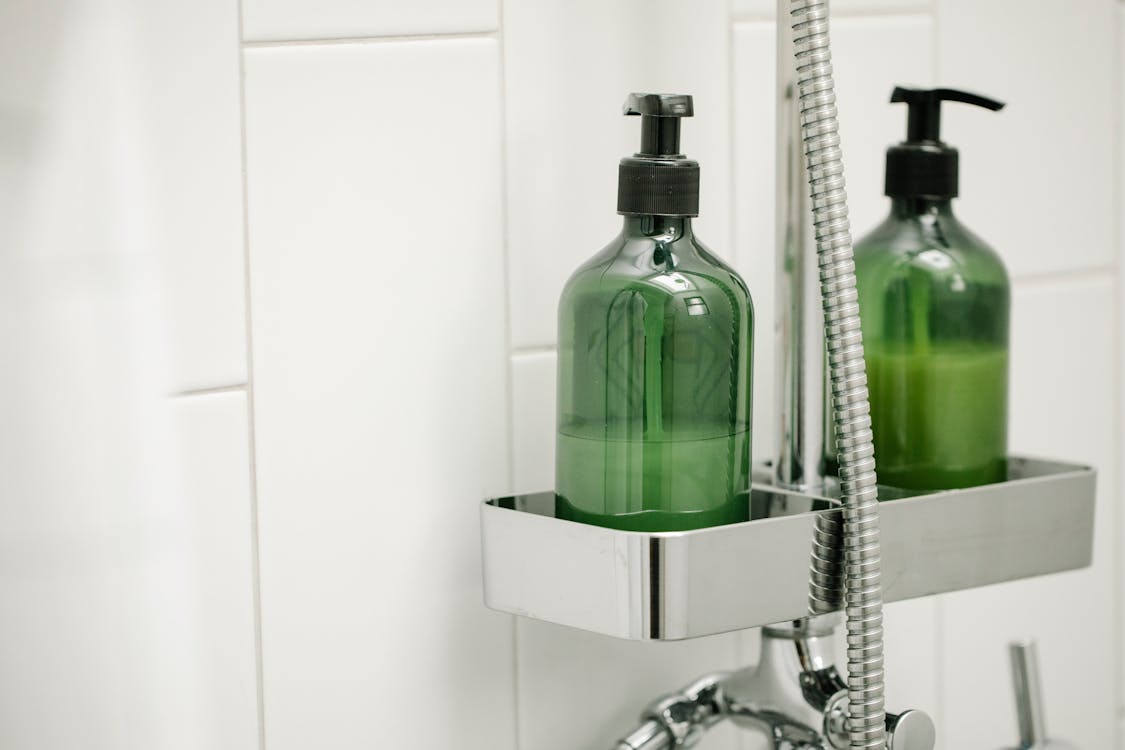
Then organize your liquids by category. For example, make separate groups for — cleaning products; perishable items (food, drink, cooking oils, etc.); beauty products, lotions, and/or toiletries; automotive fluids; paints and solvents, and so on. You can label the groups with a few post-its. And make sure you clearly separate any hazardous, toxic, and/or non-transportable items from the rest (more on that below).
Step 2: Dispose of the Items You Don't Need
The nature of the packing and moving process means you have to declutter and get rid of stuff you don’t need. And decluttering isn’t always easy with liquids. So make sure you weigh the pros and cons of packing and transporting each one. For example, unopened, factory-sealed canned goods and liquid containers — ketchup, pickles, toothpaste, shampoo, etc.— should be fine if packed properly. But anything opened really should be thrown away, even if you’ve grown attached.
Keep in mind that even minor liquid spills, including from water, can damage much more than just the moving boxes they’re in. And the cost of replacing a certain liquid can often be far less than that of repairing the damage it might do to your other items (like a piece of antique furniture, a favorite dress, a computer, and so on). Moreover, the damage done can not only be costly but often irreversible.
So give it some thought and ask yourself if the risk is worth the reward. If not, discard the liquids that you know you can do without in your new home with confidence. You can also leave a few things behind — like cleaning supplies and/or a bottle of wine (if you’re feeling extra nice) — for your new homeowner.
Prohibited Liquid Items
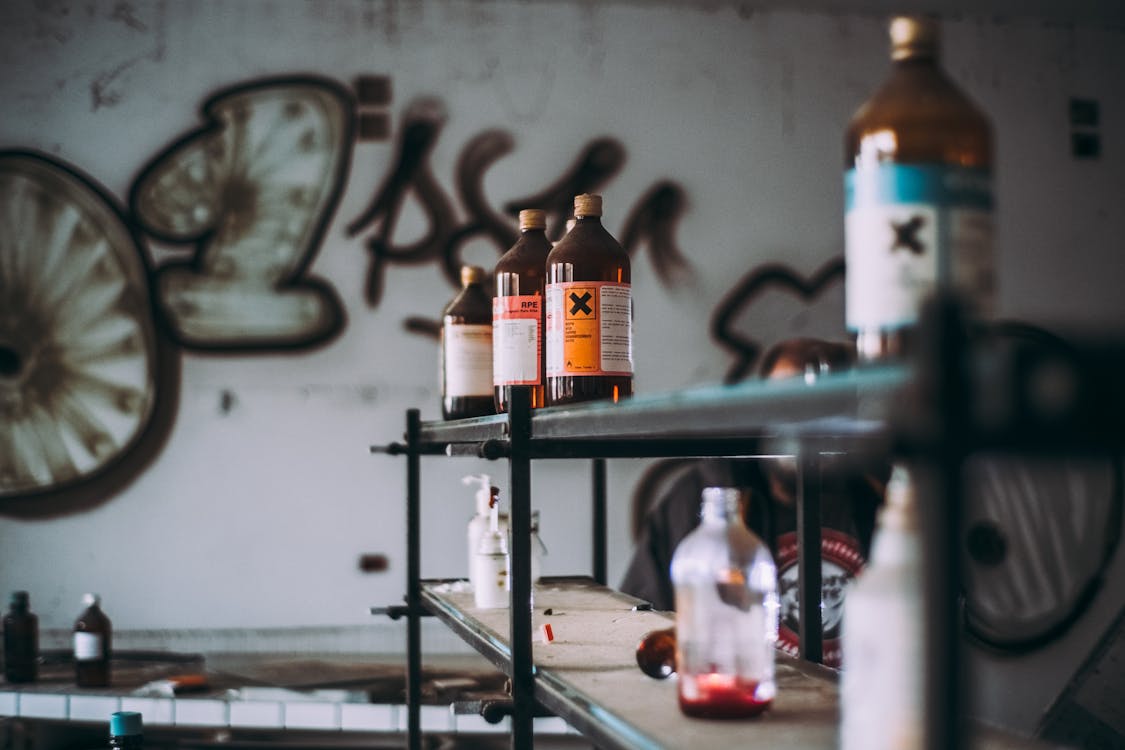
While it’s best to dispose of as many liquids as you can before moving, there are also certain things that you’re just not allowed to move. These are items the moving of which is strictly prohibited by state and federal laws, which means a professional moving company will not pack or load them. They generally include flammable gasses, toxic substances, hazardous liquids, and basically anything in an aerosol can. And while some risk factors may be obvious, the complete list is actually quite long. So chances are that there are at least one or two liquids in your house not fit for transport.
Here are a few common items that shouldn’t go into a moving truck:
- Oxygen;
- Propane;
- Gasoline;
- Paint;
- Nail polish remover;
- Transmission fluid;
- Corrosives (such as bleach, hydrogen, peroxide, acid, etc.);
- Poisons;
- Flammables and explosives (such as lighter fluid and certain automotive chemicals);
- Marine pollutants and solvents (i.e., fertilizer, pesticides, insect repellant, certain oils, paint thinner, and so on).
You may not be sure what liquids in your home are classified as too hazardous to move. In that case, the U.S. Environmental Protection Agency (EPA) has a comprehensive guide on Household Hazardous Waste (HHW). Said guide will also help you learn how to get rid of your hazardous materials in a safe way. And businesses can also consult the U.S. Department of Transportation (USDOT) on how to comply with federal hazardous materials regulations.
Whatever the move — before you start packing, make sure you know exactly what liquids can and can not be part of it.
Step 3: Get Packing Materials
Once all your liquids are sorted, clear a work area and stock up on some packing materials. You’re going to want:
- Moving boxes (NOTE: professional moving boxes are more reliable than average cardboard boxes due to an extra layer of protection. So if a leak does occur, there are fewer chances of the box itself breaking);
- Plenty of padding (bubble wrap, cloths, etc.);
- Packing tape;
- Plastic bags (grocery bags, garbage bags, ziplock/resealable bags, etc.);
- A few plastic bins and containers;
- Scissors;
- Markers.
When packing liquids, you’re basically trying to prevent both leakage and breakage. In other words, it’s all about as much protection and foresight as possible.

Step 4: Securely Pack and Label the Items
You can pack toiletries separately — as these are probably the most common liquids to move. But depending on their size, your other liquids might take a little more time. Once you get the hang of it though, the process is fairly quick and painless:
1) Cut Squares From Your Plastic Bags
Make sure each one is slightly bigger than the opening of the respective container. These will help prevent leaks.
2) Remove The Container’s Cap/lid
Remove the cap/lid, wrap, and secure the opening with a plastic square, and close it back up firmly, with the square in place. Use tape if you need to, but don’t apply too much pressure.
3) Pack The Liquids in Plastic Bins
Stand them upright, either separately or in small groups. You can stack certain small plastic tubes and bottles, but don’t overdo it. You can also use Tupperware and/or buckets to store the liquids or even a plastic bag for the smaller stuff. But make sure everything is neither packed too tightly nor can it move around too much.
4) Ensure Containers Safety
Make sure both the individual containers and the bags/bins/buckets they’re in are securely sealed (with tape, zip locks, knots, and so on). For glass bottles and other fragile items, provide plenty of cushioning (i.e., bubble wrap, rags, etc.).
5) Label the bins, containers, and bags.
6) Add Some Extra Protection to The Moving Boxes —
For instance, add a few layers of plastic, napkins, cloths, etc. — especially at the bottom. This will help prevent both leakage and breakage. Place the plastic bins (and so on) inside, keeping them upright when you can.
NOTE: Try to fill up the empty spaces so things don’t move around, but also be sure not to put too much pressure on the liquids.
7) Seal And Secure The Boxes With Packing Tape.
8) Label The Boxes Clearly.
You want to be sure that both you and the movers know exactly what’s inside. Big cues like “LIQUIDS,” “FRAGILE,” “THIS SIDE UP,” “DO NOT TILT”, “GLASS,”, etc. are key here.

It might also be helpful to read this guide: When to start packing for a move.
Items You Should Move Yourself
The things you should transport yourself are basically anything that is prohibited (such as firearms, explosives, gasoline, etc.) or anything of value that doesn’t necessarily require packing (i.e., smaller and/or more delicate items). For example, maybe you have a favorite cologne/perfume you don’t want to toss because it’s both expensive and not so easy to find. Lighter fluid, nail polish remover, or a few cans of paint can easily be carried by hand or put in your car. Meanwhile, toothpaste, soap, shampoo, deodorant, make-up — you’ll probably want quick access to most of these fairly soon after you move in too. And if your wine collection has a certain level of both sentimental and monetary value, then it’s probably best to not put it in a box and hope for the best either.
Meanwhile, liquids particularly can be very troublesome when it comes to moving — often suddenly and without warning. So if you do choose to pack them, pack wisely. And maybe enlist the help of professional movers just to be on the safe side.
If you found this article useful, you might want to consider reading our helpful how to pack guide.
LIKE OUR FACEBOOK PAGE FOR MORE GREAT MOVING TIPS: Oz Moving & Storage

About the author |

Nancy Zafrani | General Manager |
Nancy Zafrani is the experienced General Manager of Oz Moving & Storage, with 30 years in the industry and a lifetime of knowledge as a New Yorker. She helped grow the company from 3 employees to 200 with 50 trucks and locations across the US. Her experience and organizational skills have led to over 500.000 successful moves. She is proud to lead a company that provides the best possible moving experience